In SharePoint 2007, if you created a new site collection using the ‘Collaboration Portal’ template, it would come with a number of sites, including the Search Center. In SharePoint 2010, this is no longer the case. There isn’t a Collaboration Portal template for starters, the nearest you’ll find is the Enterprise Wiki template which is my recommended starting point for Intranets, KM and Collaborative Sites. (Side note: Another example of poor usability on Microsoft’s part. The Enterprise Wiki template is available in both the Standard and Enterprise editions of SharePoint 2010. When you read about features with ‘Enterprise’ in the title, don’t assume they are limited to the Enterprise Edition, in most cases they are also available in Standard.)
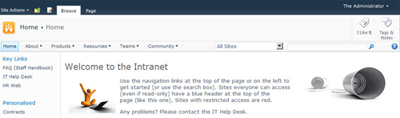
In SharePoint 2010, the clue is in the search box:

When you create a new site collection, the default search settings limit search to within the current site only and uses built-in search pages. If you want to search across multiple sites (a fairly normal requirement for most internal SharePoint deployments), use search scopes and configure different types of results pages, you will be wanting a dedicated search site. Here’s what to do:
Create a Search site
1. At the root of the site collection where you want the Search site to live, click Site Actions and select ‘New Site’
2. Select the search site template you want to use
3. Enter a title and URL (Search works for me…) and create the site
There are up to three search site templates to choose from (and you should use a search template if you don’t want to create a lot of extra work for yourself setting up search query and results pages):
1. Basic Search – available with all versions of SharePoint
2. Enterprise Search – requires SharePoint 2010 Server: Standard or Enterprise edition (yes, another of those ‘Enterprise’ features also available in Standard)
3. FAST Search – requires SharePoint 2010 Server Enterprise Edition (or FAST add-on/dedicated)
The search query box is automatically integrated every SharePoint site within the global navigation bar (as shown in the first image above). Unless you particularly want to also have the Search site listed in navigation, go into the Navigation settings and hide it.
Configure Search Settings
Once you’ve got your search site, you can now configure the search settings to use it. This step needs to be repeated for each site collection that you want to point to the Search site.
1. At the root of the site collection, go to Site Actions – Site Settings.
2. Under Site Collection Administration, click on Search Settings
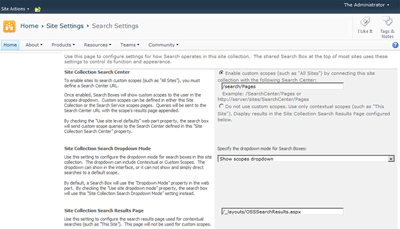
3. Within Search Settings:
- For the Site Collection Search Center, enter the URL to your search site in the format /search/Pages (replace the word ‘search’ with the site URL for your search site, if different))
- In Site Collection Search Scopes dropdown mode, select ‘Show search scopes’
The image below shows the settings for my demo machine:
4. Click OK and you’re done.
Once the search settings are configured, the search box will show scopes with the default set to search across all sites instead of just the current site:
Don’t forget, you’ll need to configure search settings for each site collection that you want to point to the Search site. Whilst the URL will be relative for the site collection where the search site is located, for all other site collections you will need to enter the full path (for example, on my demo the URL is http://sp2010/search/ for all other site collections)
Enter a search query in the new search box and you will be routed to the Search site to display results:
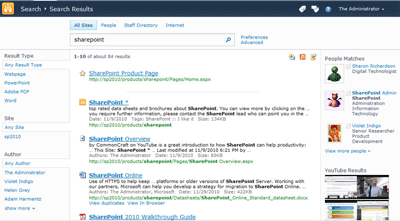
In the image above, I’ve configured the default results page in the Search site to also include federated search results. When I enter the query ‘SharePoint’ I can see documents and items on the Intranet (along with refiners on the left to filter results), people who have SharePoint in their profile and federated results YouTube.
a04a41a6-fcfb-428b-8288-4aaf2ab40bba|1|1.0